In cloud computing, failures are not a matter of if, but when. Hardware degrades, networks experience transient latency, downstream APIs experience outages, and configurations drift. Historically, organizations attempted to prevent these failures by building increasingly complex, rigid architectures. However, as cloud environments have evolved, Microsoft has championed a fundamental paradigm shift: building systems that are built to bounce back rather than attempting to prevent every conceivable failure.
This shift is the foundation of modern cloud resiliency. Rather than assuming your infrastructure is indestructible, you must design your applications to survive infrastructure degradation, self-heal, and maintain degraded functionality when dependencies fail.
But design is only half the battle. How do you prove that your application will actually survive a real-world regional outage or database failover? This is where Azure Chaos Studio comes in. As a fully managed chaos engineering service, Chaos Studio allows you to safely inject controlled faults into your Azure resources, validating your application’s resilience, observability, and recovery paths before a production incident occurs.
If you are new to the core building blocks of Microsoft’s cloud, check out our AZ-900 Cheatsheet: The Complete Azure Fundamentals Study Guide to understand how Virtual Machines, Scale Sets, and Resource Groups operate before diving into advanced chaos experimentation.
Reading path: Learn the resilience model first, then follow the experiment workflow before applying the safety and governance recommendations.
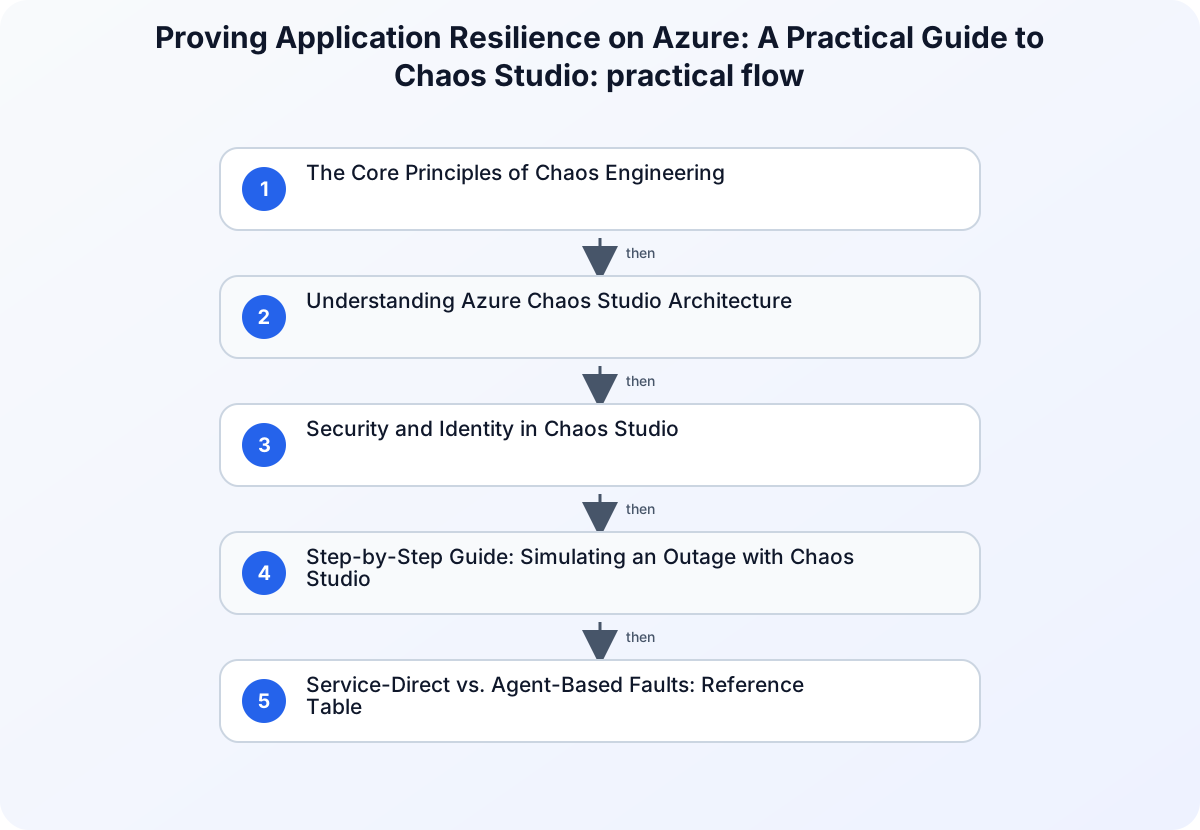
The Core Principles of Chaos Engineering
Chaos engineering is not about randomly breaking things in production. It is a highly disciplined, scientific approach to identifying systemic weaknesses. The methodology follows a strict four-step lifecycle:
- Define the Steady State: Measure your system’s normal behavior using key performance indicators (KPIs) such as request latency, error rates, and system throughput.
- Formulate a Hypothesis: State what you expect to happen when a specific fault is introduced. For example: “If we inject 200ms of network latency to the database, our application’s cache layer will absorb the read traffic, and user-facing response times will increase by no more than 50ms.”
- Introduce the Disturbance: Run a controlled experiment injecting the fault (e.g., network latency, VM shutdown, DNS failure).
- Analyze and Improve: Compare your metrics against the steady state. If the system failed to self-heal or degrade gracefully, you have uncovered a vulnerability that must be remediated.
Understanding Azure Chaos Studio Architecture
Azure Chaos Studio provides a structured, secure framework to orchestrate these experiments. To use Chaos Studio effectively, you must understand its core architectural components: Targets, Capabilities, and Experiments.
Refer to the architecture diagram chaos-studio-architecture.svg below to visualize how these components interact with your resources and security boundaries.
1. Targets and Capabilities
Before you can inject a fault into an Azure resource, you must explicitly onboard that resource to Chaos Studio as a Target. This onboarding process acts as an explicit opt-in, ensuring that chaos experiments cannot be run against unauthorized resources.
Once a resource is a Target, you enable specific Capabilities on it. A Capability represents a specific type of fault that can be applied to that resource type. For example, a Virtual Machine Target might have capabilities for CPU pressure, physical disk stress, or network latency.
2. Service-Direct vs. Agent-Based Faults
Chaos Studio categorizes faults into two distinct execution models:
- Service-Direct Faults: These run directly against the Azure control plane. They do not require any software installation on the target resource. Examples include stopping a Virtual Machine, failing over an Azure Cosmos DB database, or blocking traffic via network security group (NSG) rules.
- Agent-Based Faults: These run inside the guest operating system of a Virtual Machine or Virtual Machine Scale Set (VMSS). They require the installation of the Azure Chaos Agent (via a VM extension or Azure Arc). Examples include injecting CPU/memory pressure, simulating disk fullness, or killing specific OS-level processes.
3. Chaos Experiments
An Experiment is an Azure Resource Manager (ARM) resource that defines the chaos workflow. It is structured hierarchically:
| Concept | Explanation |
|---|---|
| Steps | Executed sequentially. A step might represent a phase of your test (e.g., “Phase 1: Database Degradation”). |
| Branches | Executed in parallel within a step. This allows you to inject multiple faults simultaneously (e.g., stressing the CPU of VM-A while blocking network access to VM-B). |
| Actions | The actual fault execution (e.g., CPU pressure) along with parameters like duration, stress percentage, and target resource IDs. |
Security and Identity in Chaos Studio
Injecting faults into cloud infrastructure requires strict security guardrails. Chaos Studio is built with enterprise security at its core, relying heavily on role-based access control (RBAC) and managed identities.
To govern these experiments safely, Chaos Studio relies on Microsoft Entra ID Explained: Users, Groups, Apps, Roles, and Conditional Access to authenticate and authorize fault injection actions.
When you create a Chaos Experiment, Azure assigns a System-Assigned Managed Identity (or a User-Assigned Managed Identity) to that experiment. This identity is what actually executes the faults against your target resources. For example, if your experiment includes a “VM Shutdown” action, the experiment’s managed identity must be granted the Virtual Machine Contributor role on the target VM.
Without explicit RBAC permissions, the experiment will fail to run. This design ensures that even if a user has permission to trigger an experiment, the experiment itself cannot touch resources it hasn’t been explicitly authorized to disrupt.
For security engineers looking to master the broader compliance, identity, and security landscape in Microsoft Cloud, reviewing our SC-900 Cheatsheet: Microsoft Security, Compliance, and Identity Fundamentals Study Guide is highly recommended.
Step-by-Step Guide: Simulating an Outage with Chaos Studio
Let’s walk through a practical scenario: proving that a multi-instance web application running on Azure Virtual Machines can survive a sudden CPU spike on one of its nodes without dropping user requests.
Step 1: Onboard the Target Virtual Machine
First, we must register our target VM with Chaos Studio and enable the agent-based capabilities.
- Navigate to Azure Chaos Studio in the Azure Portal.
- Click on Targets in the left-hand menu.
- Select your target Virtual Machine, click Enable targets, and select Enable agent-based targets (VM, VMSS).
- Provide the managed identity details for installation. This installs the Chaos Agent extension on your VM.
- Once onboarded, select the VM, click Manage capabilities, and check the box for CPU Pressure.
Step 2: Create the Chaos Experiment
Next, we define the experiment that will trigger the CPU pressure.
- In Chaos Studio, click Experiments -> Create -> New Experiment.
- Define your Subscription, Resource Group, and Name (e.g.,
exp-web-cpu-stress). - In the Designer tab, configure the step and branch:
- Step 1 / Branch 1: Click Add action.
- Select CPU Pressure from the list of available agent-based faults.
- Set the parameters:
- Duration:
10 minutes - CPU Load:
95%
- Duration:
- Click Next: Target resources and select your onboarded Virtual Machine.
- Click Review + create to provision the experiment resource.
Step 3: Grant RBAC Permissions to the Experiment
Because this is an agent-based fault, the experiment’s managed identity needs permission to interact with the VM guest agent.
- Navigate to your target Virtual Machine in the Azure Portal.
- Click Access control (IAM) -> Add role assignment.
- Select the Reader role (or the specific custom role required for Chaos Agent actions) and assign it to the Managed Identity of your newly created Chaos Experiment.
- Save the assignment.
Step 4: Run the Experiment and Observe
With permissions in place, you are ready to execute the test.
- Navigate back to your Chaos Experiment in Chaos Studio.
- Click Start.
- Open your application’s Azure Monitor dashboard in a separate window.
- Observe your steady-state metrics:
- Does the load balancer correctly route traffic away from the stressed VM instance?
- Does your autoscale rule trigger, provisioning a new VM instance to handle the load?
- Do end-users experience HTTP 5xx errors, or does the application degrade gracefully?
Inspect the experiment without starting it
Use authenticated GET requests to capture the experiment definition and prior execution records before anyone starts another fault run. The example uses the generally available 2025-01-01 Chaos Studio REST API and does not create, update, start, cancel, or delete an experiment:
$SubscriptionId = az account show --query id --output tsv
$ResourceGroup = 'rg-chaos-lab'
$ExperimentName = 'exp-web-cpu-stress'
$ApiVersion = '2025-01-01'
$ExperimentId = "/subscriptions/$SubscriptionId/resourceGroups/$ResourceGroup/providers/Microsoft.Chaos/experiments/$ExperimentName"

az rest --method get --url "https://management.azure.com${ExperimentId}?api-version=${ApiVersion}"
az rest --method get --url "https://management.azure.com${ExperimentId}/executions?api-version=${ApiVersion}"
Replace the example resource group and experiment name, then save the returned identity, selectors, actions, and execution states with the change record. A successful read confirms visibility of the resource; it does not authorize a fault run or prove that the configured blast radius is safe.
Service-Direct vs. Agent-Based Faults: Reference Table
To help you plan your chaos strategy, use this comparison table to choose the right fault type for your scenarios:
| Feature / Attribute | Service-Direct Faults | Agent-Based Faults |
|---|---|---|
| Execution Layer | Azure Control Plane (ARM) | Guest Operating System (OS) |
| Prerequisites | Resource onboarding only | Chaos Agent installation (VM Extension / Arc) |
| Network Requirements | None (executed via Azure API) | Requires outbound internet access to Chaos service |
| Typical Scenarios | VM shutdowns, NSG blocks, Cosmos DB failovers | CPU/Memory spikes, disk space exhaustion, process kills |
| Supported Targets | AKS, Cosmos DB, Key Vault, App Services, VMs | Azure VMs, Virtual Machine Scale Sets (VMSS) |
| Security Footprint | Managed Identity requires Azure RBAC roles | Managed Identity requires OS-level agent execution rights |
Best Practices for Proving Resilience Safely
To ensure your chaos engineering program is constructive rather than destructive, adhere to these proven industry practices:
1. Start Small and Expand (Blast Radius Control)
Never start by testing a multi-region outage in production. Start by testing a single process failure in a local development or staging environment. Once your application consistently survives local faults, scale up to testing infrastructure-level failures in pre-production, and eventually schedule controlled tests in production during off-peak hours.
2. Always Have an Automated Abort Mechanism
Before starting an experiment, define a clear “Emergency Stop” condition. If your user-facing error rate spikes above 1% or database latency exceeds 1000ms, abort the experiment immediately. Chaos Studio allows you to cancel running experiments instantly, which stops fault injection and initiates rollback procedures.
3. Integrate Chaos into your CI/CD Pipelines
Resilience is not a one-time check. As developers deploy new code, resilience profiles can change. Automate your chaos experiments by triggering them via Azure Pipelines or GitHub Actions as part of your nightly integration testing or post-deployment validation steps.
Conclusion and Next Steps
Azure Chaos Studio takes chaos engineering out of the realm of custom scripting and turns it into a structured, secure, and repeatable cloud discipline. By shifting your mindset from preventing failures to proving resilience, you can build systems that are truly built to bounce back.
In our next installment of this series, we will explore how to design multi-region architectures that leverage these chaos testing methodologies to survive complete regional failures.